User Guide
Admin
Create User/ Update User
- This function is used to create or update user accounts in the Service Portal. This administrative function can only be used by PCCW Global administrator and Customer administrator
1. Screen
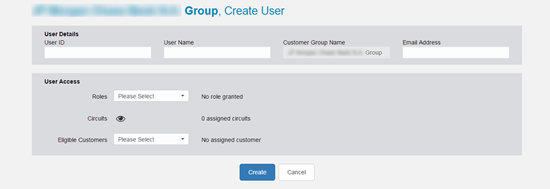
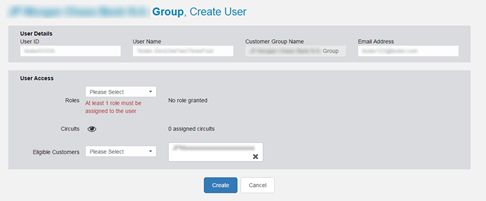
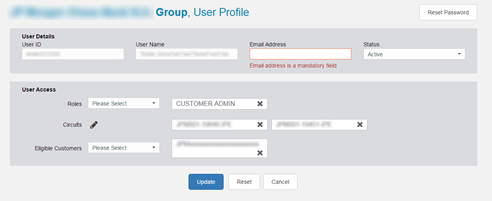
Create new user page
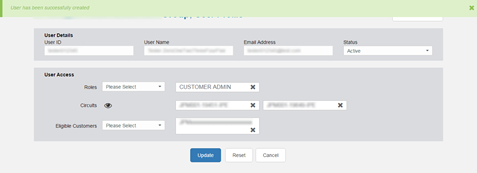
Create new user - Successful message
Create new user without User ID - Error message

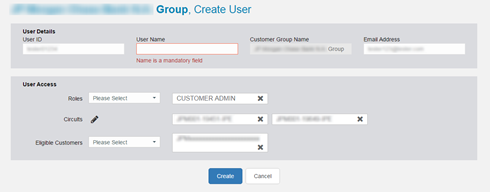
Create new user without User Name - Error message
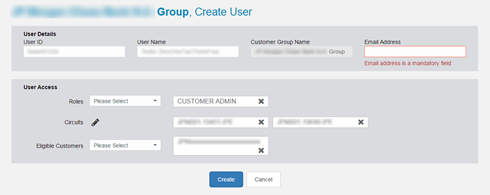
Create new user without Email - Error message
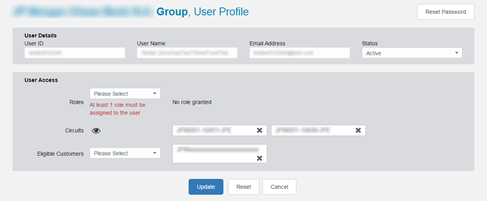
Create new user without Roles - Error message
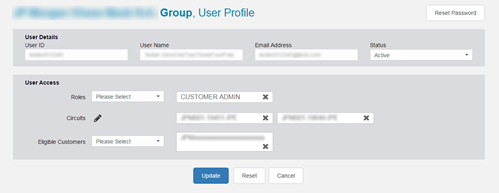
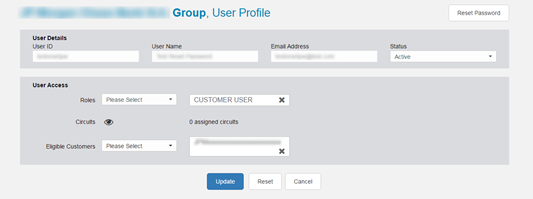
Update user page
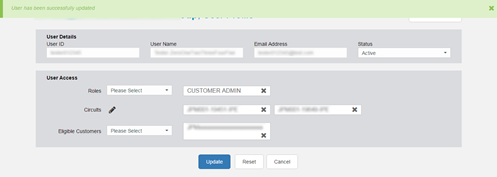
Update user page - Successful message
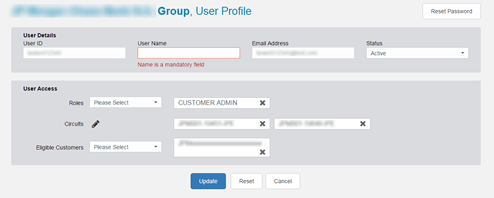
Update user page without User name - Error message
Update user page without Email address - Error message
Update user page without Roles - Error message
Update user page with reset password - Successful message

2. Fields
- User ID: New user's login ID, which must be unique in the system
- User Name: New user's full name
- Customer Group Name: A unique customer group name assigned to each user. It is an assigned value and cannot be changed.
- Email Address: New user's email address, which will be used for resetting their password if the person forgets his/her login credentials
- Status: User status. Default is active.
- Roles: New user's role. Multiple roles can be assigned to a new user
- Circuits: New user's assigned circuits. Only roles related to customers can have circuits assigned to them
- Eligible Customers: New user's customers
3. Procedures
- Click admin
 icon and select Create User to get into Create
User page or click into user details of any user in the List
User page to get into Update User page
icon and select Create User to get into Create
User page or click into user details of any user in the List
User page to get into Update User page
- Enter all mandatory fields, namely, User ID, User
Name, Email Address, Roles, Eligible Customers
and click
 icon to Assign Circuits
 - Click "Create" to complete user creation or click "Update" to complete user update
4. Note
- Customer Group Name is not required when creating a new PCCW Global administrator
- A list of the available customer groups will be displayed when you type the name in the Customer Group name field. You can either select from the list or type into the Customer Group Name field
- For each user account to be created or updated, you can grant a specific role to the user so he/she can access the required functions in the Service Portal, and you can assign specific customers that he/she represents.
- To grant a role to a user account, select the role from the list of Roles and click your desired roles
- To revoke a role from a user account, select the role from
the list of Roles and click
 button
- To assign a customer to a user account, select the customer from the list of Eligible Customers and click your desired customers
- To revoke a customer from a user account, select the customer
from the list of Assigned Customers and click button
- The email address for each user account must be unique
- Upon the successful creation of a new user account and its acceptance by the system, the user will receive a confirmation message with a temporary password
-
Button Assign Circuits will only be enabled if Customer
Admin/Customer User Role is selected
- To reset the password of a specific user, click "Reset Password" button in the Update User page of that user. A reset password email will be sent to that user for password recovery
Assign Circuits
- This function is used to assign circuits to the user. It will restrict to the user only those circuits that are assigned to him for the customer related operations
1. Screen
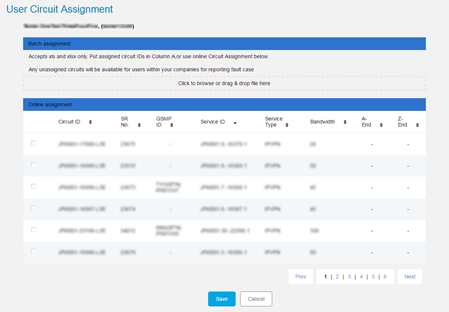
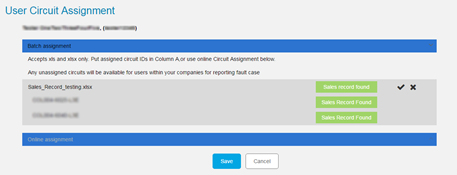
Assign Circuit Page
2. Procedures
- To access the Assign Circuit page, click the Assign
Circuit button in the Create User or Update User page
- Select "Check boxes" associated with Circuit IDs , click Save to confirm and return to Create User page or Update User page, or
- Perform batch assignement by uploading an excel worksheet
- Click Save button to confirm the assignment and return to the Create User Page or Update User Page
3. Note
- The upload file should be in excel format (.xls and .xlsx) only
- The upload file should contain at least one row
- The system will only process data contained in column A up to the first empty row. Other data will be ignored
- You may sort the results in the table, by clicking on the column header
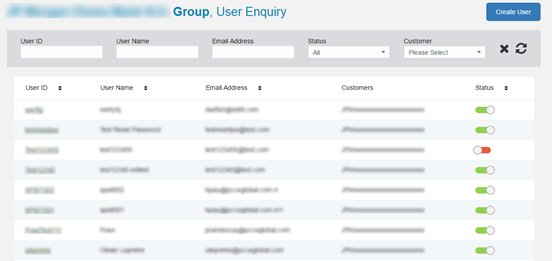
List User/ User Enquiry
- The system provides a User / User Enquiry function that can be used it to locate specific users in the system. This administrative function is expected to be used by Customer administrator.
1. Screen
User Enquiry Page
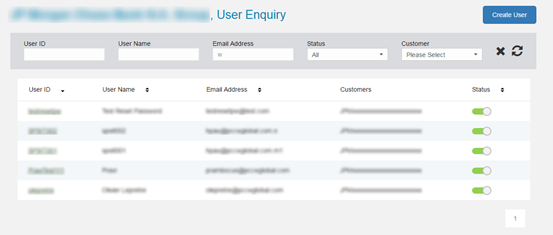
User Enquiry Page - Search Result
Update User Page
2. Fields
Forget Password Page,- User ID: User's login name, partial search allowed
- User Name: User's full name, partial search allowed
- Email Address: User's email address, partial search allowed
- Status: User's account status
- Customer: User's selected eligible customer
3. Procedures
Searching an user- To access the List Users / User Enquiry page, Click
admin icon
and select List Users. To locate a specific user, you need to
input specific search criteria like User ID, User Name,
Email Address, Status and Customer, and then
click the
 Search
button to display the results
Note
Search
button to display the results
Note
- Leave search fields blank if you intend to display all users Wild card search is supported
- To reset search results and the search criteria to default
values , click Clear
button
- To create a new user account, click Add User
- You may sort the results in the table, by clicking on column header
Editing an user
- Generally the status of a user can be changed in the List User page.
- Click the toggle icon of any user in the table row to change the status from Active or Inactive, or vice versa
- A confirmation window will be displayed and the icon will be changed if "OK" is clicked
- Or once you have located specific user in the List Users / User Enquiry page, you can access the user profile and make necessary changes.
- In the List User result page, locate and click on the User ID. The Update User page will be ready for editing
- You can go back to the user enquiry page any time by clicking the "Cancel" button
User Access Log
- The user access log function allows users with Customer Administrator or PCCW Global Administrator right to view user access details in the system.
1. Screen
User Access Log Page
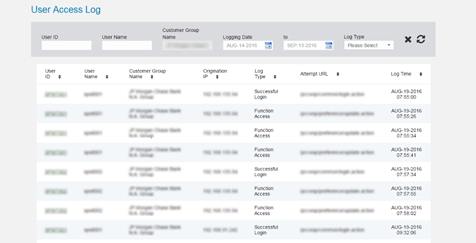
User Access Log - result display screen
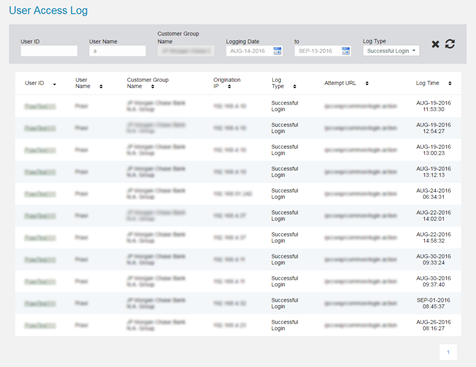
2. Fields
3. Procedures
You can access the User Access Log screen by clicking admin icon and
selecting Access Log .Specify any searching criteria
- Click
Search button to list out the relevant user logs that match
the search criteria
- Click
Clear button to clear all search criteria you have entered
- You may sort the results in the table, by clicking on the column header
 Download Service Portal user
guide Download Service Portal user
guide |
| Download
MPLS VPN Reports user guide |
| Download
Ethernet Performance Reports user guide |